Do’s and Don’ts of Houseplants

Houseplants have become prominent in interior design lately, and for good reason. These green little wonders can purify the air in your home , lift spirits on those grey winter days, and add visual interest to your favorite rooms. Before you go out and start buying plants though, read through these tips.

Do – Think about children and animals when choosing your plants

Before you bring a houseplant home you should look up whether or not the plant is toxic to humans and animals. If your home is filled with inquisitive little ones – of the human and/or pet variety- keep any potentially toxic plants out of reach and make sure to pick up any fallen leaves of debris from the plant.

Here are a few resources to start off with: 

List of toxic plants from the ASPCA

Poison.org

If you find contradicting information it is best to err on the side of caution if you are concerned about accidental ingestion.

Do – Know how much light exposure the room in your home has

Certain plants can thrive in dark rooms, while others simply won’t tolerate it. For happy houseplants check out their light requirements and put them in proper spaces in your home.

Do – Know how big the houseplant is going to get.

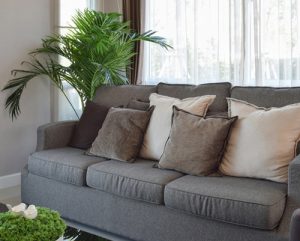
Your new houseplant might not stay small forever.  Some houseplants, like the parlor fern or some philodendrons can get big, or can get unruly overtime. Large houseplants may end up requiring a support system so keep that in mind when choosing new plants

Don’t – Crowd your plants

When you bring your new houseplant home chances are good that you’ll have to repot it. Choose a new pot that is at least two inches larger than the current container. That should give your plant plenty of room to grow.

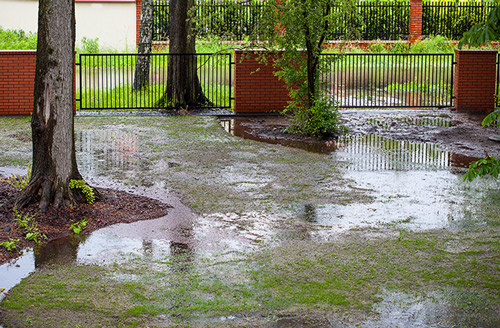
Don’t– Overwater your plants

It can be really easy to overwater your new plants, a good rule of thumb is to let the soil of most houseplants dry out between waterings. Of course there are exceptions to this rule, which is why it is always important to check individual plant’s requirements.

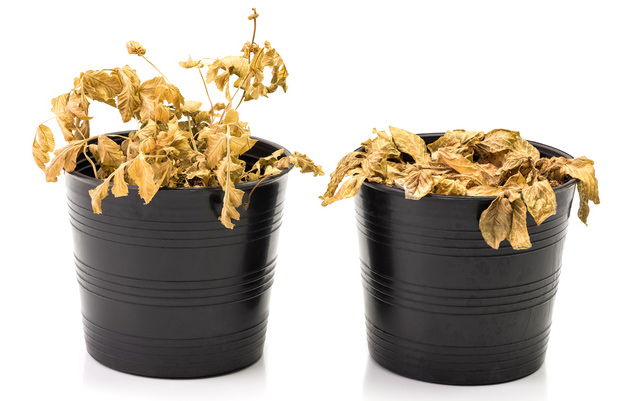
Don’t – Feel bad if your first attempts at keeping a houseplant don’t go well

Things happen and houseplants can die, that doesn’t mean that you have a black thumb. There are plenty of low maintenance plants for you to start out with and build up your knowledge on proper care of houseplants.

Welcoming Spring – Looking at drainage

If “April showers bring May flowers” then we should be expecting a bloom filled May here in the Capital Region.


If your yard looks like this, call a professional.

Until then it’s time to shift focus to the foundation of your home and the land around it. What we’ll be looking for is any potential drainage issues near the footprint of your house.

Gradually the ground around your home may become impacted, or erode away over time. Inspecting the grade of the land around your home on a regular basis can save you a whole lot of headaches and money in the long run.

If you notice any areas that allow water to pool near the foundation of your house take note. Small spots are easy enough for most home owners to fill in with topsoil and tamp down the new soil by hand, no need for expensive machinery.

Larger depressed areas around your home’s foundation may require professionals to take care of the job and fix any underlying drainage issues.

Finding Your Home’s Style

Let’s say you’re looking to change things up in your kitchen but don’t know where to begin? or maybe you’re not sure how to communicate your ideas to a contractor. Finding your own style isn’t all that hard and you can create a style board o that  Well you’re in luck, we’ll be discussing how to find your own personal style for your kitchen, but this process can be used for virtually any.


Start collecting inspiration

When you’re first starting out we suggest collecting anything and everything that catches your eye. Whether digitally, physically or a combination of the two, add freely to this collection- don’t think about it. Editing happens later, right now we are building a collection of elements that call to you. Some of these images may not end up being used at all and that’s fine. By collecting different images and ideas without editing yourself, you’ll end up finding a pattern or common thread that you naturally gravitate to.

Categorize

Now that you have a collection of inspiration for your kitchen it’s time to start breaking these images down into categories. The categories that you chose to use are up to you and your collection. A few example categories could be – “Kitchen Islands”, “Back Splashes”, “Lighting” and  “Color Palettes”. Again, don’t edit yourself in this stage, that comes next.

Refine your collection

In the beginning of this process your collection of inspirational images consisted of anything and everything that caught your eye. Now it’s time to go through and look at everything you’ve saved. Some images may have lost their appeal to you, and that’s fine, put these images aside and keep going.

Define your collection
Once your collection has been edited down it’s time to look at the images and define what elements of the photo that you like, and anything t
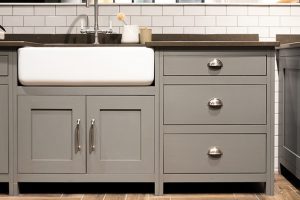
hat you might not like. For example “I really like the shape of these tiles used in this backsplash” or “I like the style of the cabinet doors, but I would prefer to see it in a different finish”. Write down your thoughts as you go through the images and hold onto it for the next step.


Bring it to your contractor

Take your curated collection of images and your notes on the specifics of what you like to your contractor. With a clearly defined picture of what you want, communicating your vision with your contractor should be a breeze.  

Spring Checkup – foundation vents

It may not feel quite like Spring yet in the capital region, but don’t let that fool you. Now is the time to start looking around the exterior of your home for any damage that may have happened during the Winter. We’re welcoming the arrival of spring by clearing and checking the foundation vents around your home.


If your home has a crawl space there are vents in your foundation. Vents allow air to circulate in the crawlspace, helping to avoid the buildup of excess moisture which could lead to mold growth.


When inspecting the vents in your foundation you first want to clear the vent of any debris that may have accumulated during the winter, after all, air can’t circulate if the vent is obstructed.


After clearing your vent check to ensure that the screen on your vent is still intact. Wild animals think that your crawlspace is the ideal place to set up camp for the winter. The screen on your vents SHOULD deter the little critters, but a damaged screen will do you very little good. Small animals, such as mice, can fit through holes as small as the diameter of a pencil, so make sure to do a thorough inspection.


Learn the Lingo – Hygge

hygge

It was big in 2016, and it looks like it will be here to stay for 2017, it’s Hygge!


…What is “Hygge”?

The Danes used the word “hygge” to describe a feeling or mood that comes from taking pleasure in everyday moments. Hygge can be described as creating an intimate, cozy, and relaxed environment where you can take time to savor the smallest special moments.

In terms of design, the concept of hygge has translated into fireplaces, warm thick blankets, soft lighting and varying shades of white.


Oh, and one last thing in case you were wondering – it’s pronounced “
hue-guh”.

3 Kitchen Trends We Love in 2017

3 Kitchen Trends

Matte Surfaces3 Kitchen Trends Matte Surface

Glossy surfaces have been popular in kitchens for years, now it’s time to switch things up a bit by introducing matte texture into the mix. You can play with this trend as much, or as little as you want. Go big and choose a matte finish for your cabinets or countertops. Or dabble in the trend by adding small touches of matte finish here and there, thinking countertops containers or maybe a hang a small chalkboard.


Quirky Personal Touches3 Kitchen Trends Quirky

Have a little fun with your kitchen and give it a touch of your personality. Brightly colored vases or other ceramics can add a bit of whimsy to the heart of your home. Just look at how the funky ceramic cactus in this example gives a very sleek and modern kitchen a touch of warmth.


3 Kitchen Trends Quartz

Quartz Countertops

Resistant to scratches, burns, and chips, quartz countertops are the most durable material on the market. Quartz countertops come in a variety of colors and styles. You can get the look of a granite countertop without the cost, or the hassle of annual maintenance.

All about Cork

corks
By Cazalla Montijano, Juan Carlos – Instituto Andaluz del Patrimonio Histórico, CC BY-SA 3.0,

Cork has been gaining in popularity over the past few years. This natural, renewable material is incredibly versatile and has many applications. From flooring to home decor you can add a little touch of warmth and coziness to your home by using this material.

Harvested from the bark of the cork oak, cork is considered to be a sustainable material because trees are not cut down to acquire the bark. Cork bark has many great properties to offer; It is resistant to mildew and mold, termites, fire and more. You can also stain and finish cork to fit your style preferences.

Take a look at a few different ways to incorporate cork in your home

4 Ways Cork Decor Can Make Your Home’s Interiors Pop
Interior Trend You’ll Be Loving in 2017: CORK IS COMING BACK

Dos and Don’t of Cabinet Care

Ever wonder how you can ensure a long and beautiful life from your cabinets? Well even if you haven’t we’re going to share with you a few do’s and don’ts for taking care of your cabinets.

DON’T

  • Drape wet hand towels on your cabinets – The prolonged exposure to moisture will damage the finish of your cabinets over time.
  • Apply a finish on dirty cabinets – Remove dust and dirt prior to application.
  • Spray glass cleaner directly onto glass doors – It overspray can damage the cabinet finish. Also make sure to to use a glass cleaner that is ammonia free.
  • Neglect to care for scratches and gouges – Cover up and protect surface areas that have been damaged using a touch up kit.

DO

  • Clean up spills and food residue immediately – Use a lint free cloth and a mild cleaner, dry the surface after cleaning.
  • Use your cabinet hardware – Protect your cabinets from dirt and oil that are on your hands by using the hardware on your cabinet doors. If you don’t have any cabinet hardware, consider adding your own.
  • Regularly dust cabinet surfaces – Use a dry lint free cloth or microfiber towel and dust in the direction of the wood grain.
  • Protect your cabinets from direct uv light by using window coverings – Prolonged exposure to UV light over time can lead to discoloration and dried our surfaces.

With these tips you can keep your cabinets looking great for years to come.

Who picks the “Color of the Year”?

Color of the year

The 2017 Pantone Color of the year is “Greenery”, who decided that?

Every year there are forecasts made as to what color palettes will be most popular in the year to come. These predictions are made by numerous institutions and style agencies, the Pantone Color Institute and Dulux are the two most prominent and well known of these institutions.

How are these colors picked?

Groups like the Pantone Color Institute are made up of correspondents and color experts. Correspondents, located all over the world, gather and report information from several sources. Fashion runways are a big source of information, and color experts who analyze and experiment with colors. Color palettes are then announced and from there.

Should I follow these color forecasts?

Short answer, no, you don’t have to. Color predictions will influence the goods and advertising images that will be presented to consumers. In the end, it is up to you, the consumer, to decide if you like something. Color trends come and go, but you’re the one who has to live with it.

If you’d like to read more about the 2017 colors of the year, check out the links below.

Pantone Color of the Year 
Dulux Color of the Year 

Learn the Lingo – Cerused Wood

Cerused Wood

There is a design trend showing up in those “Top 10 Trends for 2017” posts – Cerused Wood. Today we’re talking about what it is and it’s history.

A variety of colored waxes are available to consumers today.

Cerused wood isn’t a type of wood, it is a treatment applied to wood. Starting with the french in the 1500’s, the ceruse finishing technique was originally implemented to prevent wooden beams from rotting. Wood would be treated with a paste derived from lead; this paste would be used to fill in the grain in wooden beams and paneling, protecting the wood and contrasting the wood grain against the rest of the surface of the wood.

The ceruse finish is often applied to oak because characteristically oak has an open grain. Other hardwoods, such as ash, can make good options when looking for lumber to be treated.
Today lead based paint is no longer used to achieve cerused wood’s distinct appearance. Instead consumers can choose from nontoxic waxes that come in a variety of colors. If you love the look of cerused wood, but don’t want to use wood, large format tiles are available that will capture the the appearance you are looking for – a great option for bathrooms.